contact mic pre amp
Contact Mic Pre Amp
Hello! Thank you for finding this instruction text to the YouTube video below.
In the Video, I show how I made a contact microphone pre amp, the sources I used and I give a sound demonstration.
Here on this website, I give a little bit more information regarding the making process
In the last 1.5 years, I have been using contact microphones and was already happy with the opportunity to listen to the world around me by simply placing a piezo element on a surface. Then, I did some research on how to improve the sound quality and quickly I found the YouTube videos of Metal Marshmallow who explained very in detail why to use a pre amp. On his channel, he shows diy methods on making a contact microphone pre amplifier, however it is not completely DIY, because it includes buying his own ready made pre amplifier which is priced in $. So I thought, is there also a way if I could make it myself at home?
So, I looked further through the internet and found some instructions from Colins Lab - Maker Magazine and home-made circuits. Then I made this pre-amp and noticed an improvement. However, then I saw this video from Metal Marshmallow, in which he compares his pre amp with another pre-amp (this one), which made me doubt the quality of the pre-amp I made from Colins Lab. Thus, I thought, I give it a try and do some research again on the internet and I found another design on the website of the State Library of Queensland, Australia. This website grabbed my attention because the article talked about the problem of noise and also giving a possible solution to it. Additionally, I had a beautiful Protoboard Layout picture which made it very easy for me as a beginner to wire and solder it together.
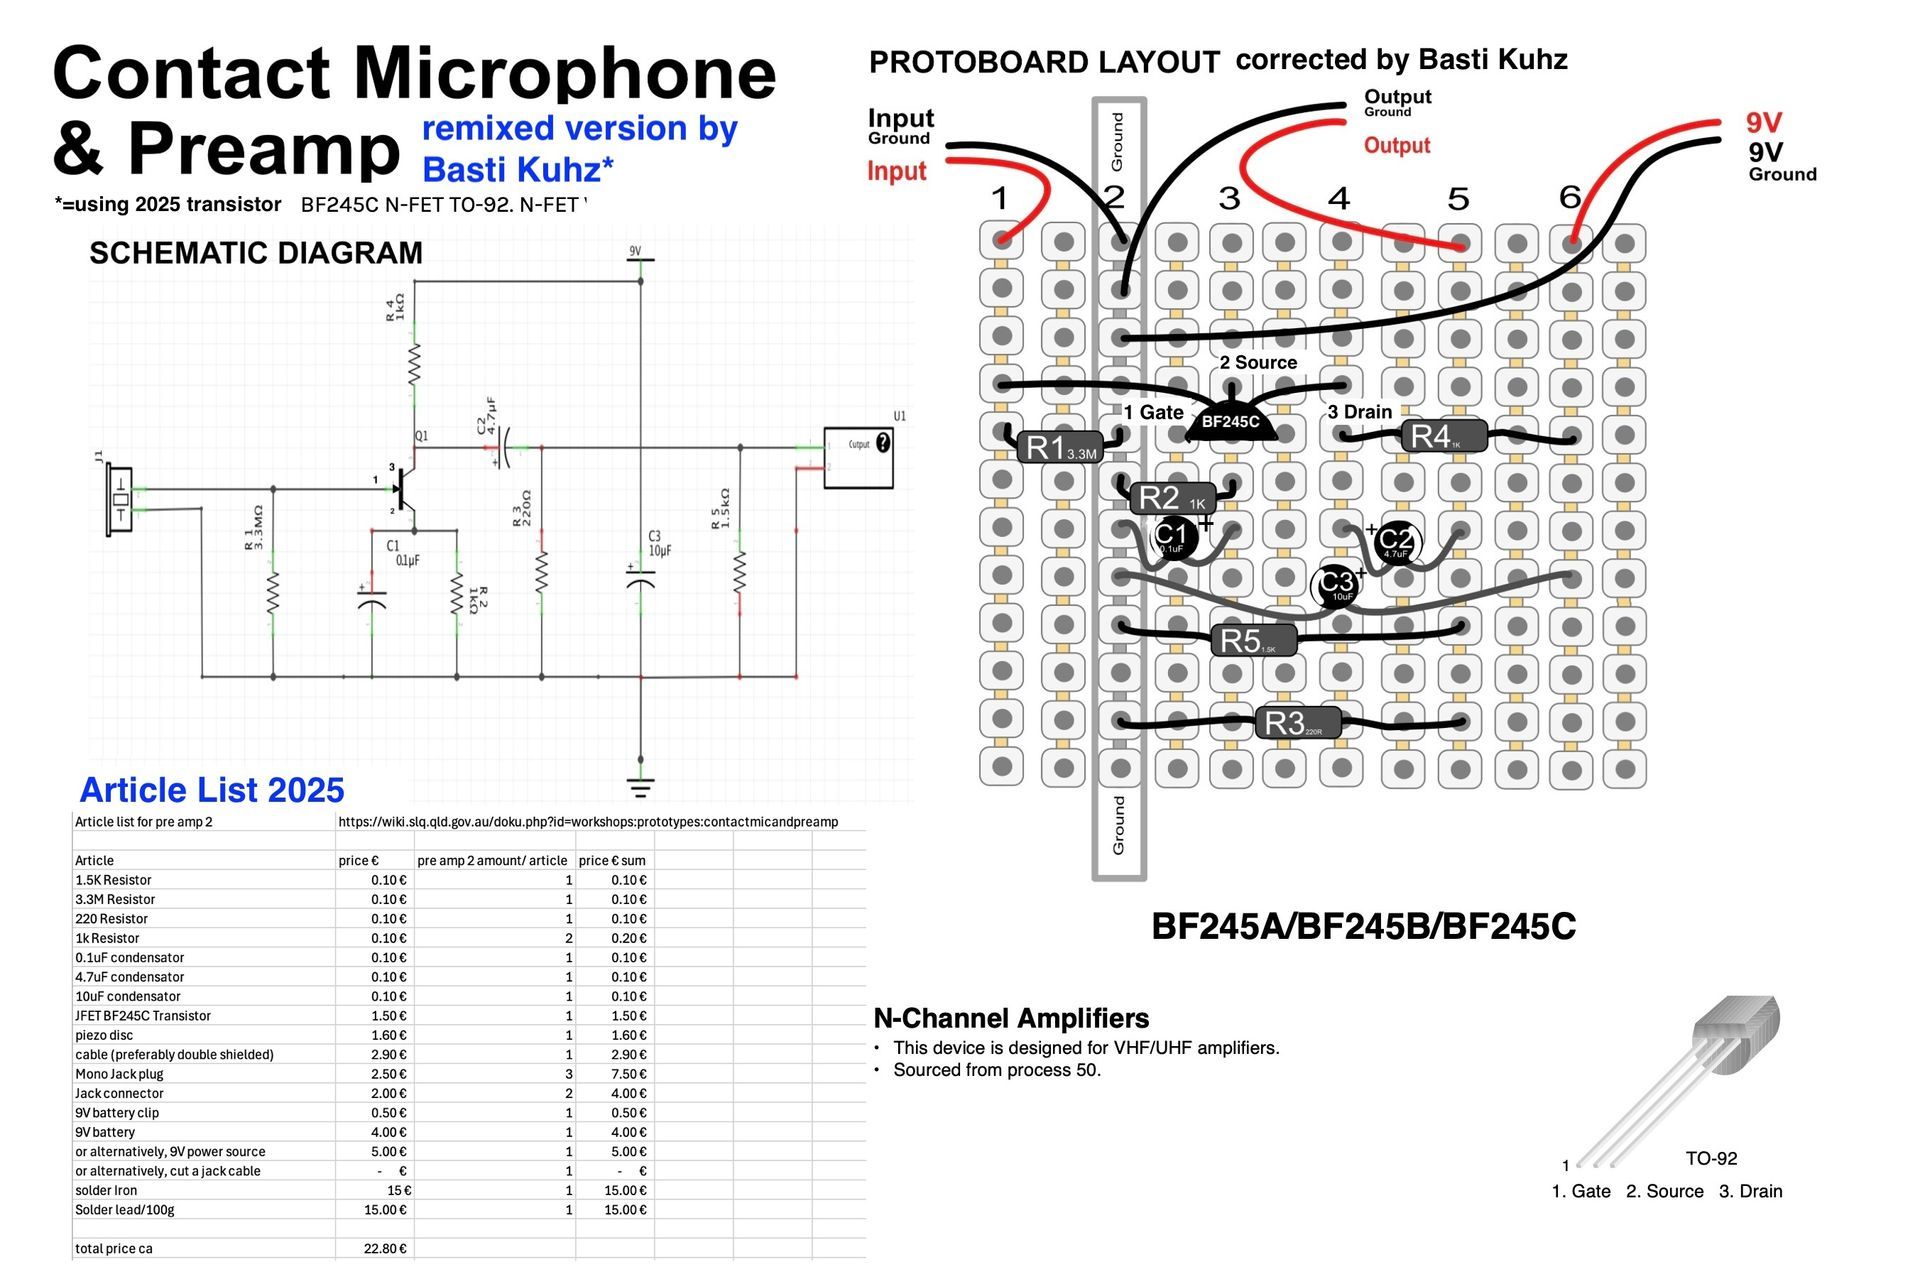
The only thing I noticed was a little mistake in the protoboard drawing and I had to use a different kind of Transistor, due to the availability of transistors in my local electronics shop (thank you SP electroniikka)
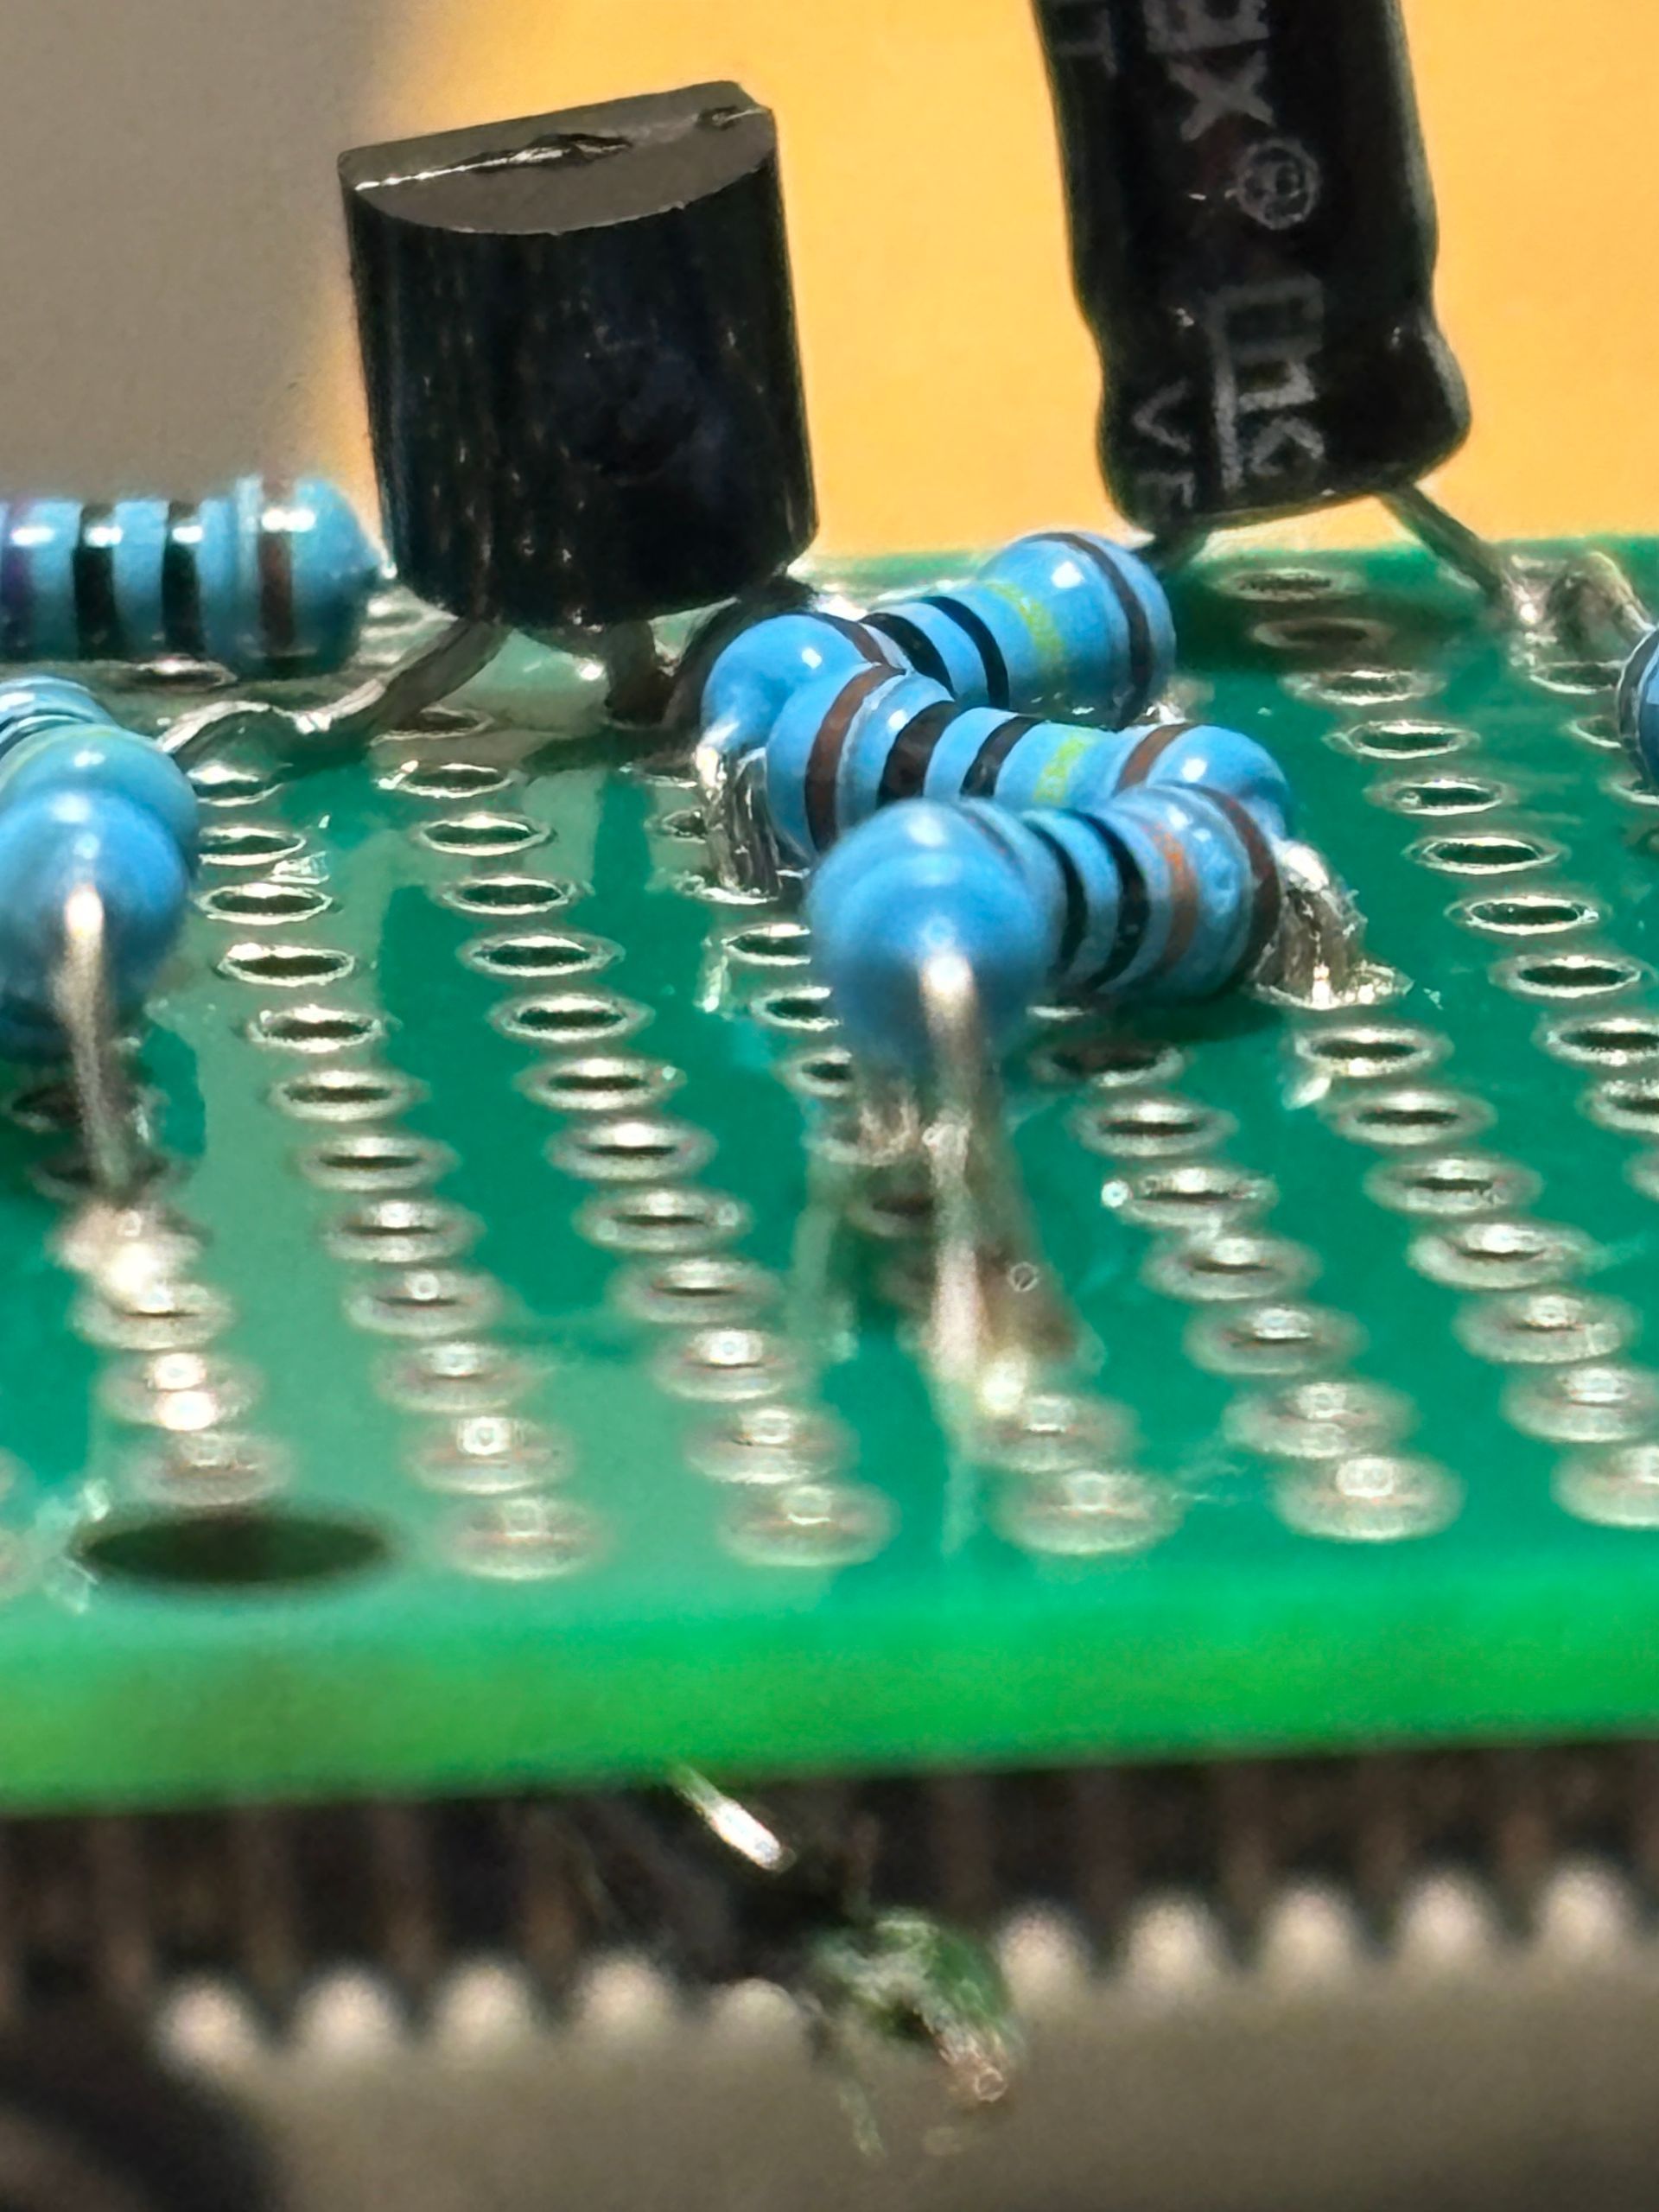
After soldering it, I immediately tested it and the result was stunning! I was so super impressed by the sounds I could get out of my 3D printer (on which I placed the contact microphones).
On this website, you can find the parts list and the updated schematic, as well as a link to the data sheet of the transistor I used.
The picture below is an updated version of the picture from
State Library of Queensland. Furthermore, it contains a schematic diagram and a bill of materials, as well as an indication of the BF245C NFET transistor I used.
Let me know if this instruction helped you
Send me an Email and tell me
U ontvangt zo snel mogelijk een reactie van ons.
Probeer het later opnieuw.
Except where otherwise noted, content on this website is licensed under the following license: CCC Attribution-Share Alike 4.0 International
Contact mic pre amp
Contact Mic Pre Amp
Hello! Thank you for finding this instruction text to the YouTube video below.
In the Video, I show how I made a contact microphone pre amp, the sources I used and I give a sound demonstration.
Here on this website, I give a little bit more information regarding the making process
dIn the last 1.5 years, I have been using contact microphones and was already happy with the opportunity to listen to the world around me by simply placing a piezo element on a surface. Then, I did some research on how to improve the sound quality and quickly I found the YouTube videos of Metal Marshmallow who explained very in detail why to use a pre amp. On his channel, he shows diy methods on making a contact microphone pre amplifier, however it is not completely DIY, because it includes buying his own ready made pre amplifier which is priced in $. So I thought, is there also a way if I could make it myself at home?
So, I looked further through the internet and found some instructions from Colins Lab - Maker Magazine and home-made circuits. Then I made this pre-amp and noticed an improvement. However, then I saw this video from Metal Marshmallow, in which he compares his pre amp with another pre-amp (this one), which made me doubt the quality of the pre-amp I made from Colins Lab. Thus, I thought, I give it a try and do some research again on the internet and I found another design on the website of the State Library of Queensland, Australia. This website grabbed my attention because the article talked about the problem of noise and also giving a possible solution to it. Additionally, I had a beautiful Protoboard Layout picture which made it very easy for me as a beginner to wire and solder it together.
The only thing I noticed was a little mistake in the protoboard drawing and I had to use a different kind of Transistor, due to the availability of transistors in my local electronics shop (thank you SP electroniikka)
After soldering it, I immediately tested it and the result was stunning! I was so super impressed by the sounds I could get out of my 3D printer (on which I placed the contact microphones).
On this website, you can find the parts list and the updated schematic, as well as a link to the data sheet of the transistor I used.
The picture below is an updated version of the picture from State Library of Queensland. Furthermore, it contains a schematic diagram and a bill of materials, as well as an indication of the BF245C NFET transistor I used.
Did this instruction help you?
Send me an email
U ontvangt zo snel mogelijk een reactie van ons.
Probeer het later opnieuw.
Except where otherwise noted, content on this website is licensed under the following license: CC Attribution-Share Alike 4.0 International